Archives

gravatar

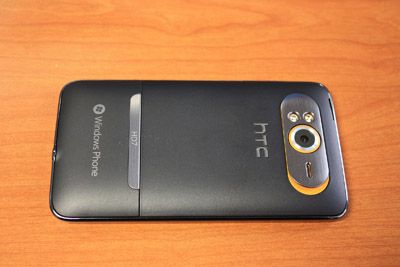
How to upgrade HTC HD7 to 32 GB


HTC HD7 Memory upgrade

WARNING : this tutorial needs you to open up your smartphone completely, and may invalidate your warranty. If you upgrade your HD7, you do it at your own risk !!

Read this tutorial entirely before starting. !!! This memory change will completely erase the contents of your phone. Backup it !!!


Thanks to Wolfman017 at XDA-developers.com

You will need the following tools :


A HTC HD7 (yeah, easy...)


- A Sandisk MicroSD 32 GB Card : Warning !! Ony some references are compatible. Check the compatibility list at the end of this tutorial. 


- A Torx screwdriver - Size : 0.4


- A little plastic card, like a fidelity card (small size)


- Tweezers


- A piece of paper


Remove the battery cover, the battery itself, and you SIM card : 


Now, you need to remove the bottom cover. To do this, insert the plastic card inside, and pull upside gently. It will be a little hard, just do it quietly until it "clics". Do the same on the other side, and finish removing the cover :


Take the screwdriver. At minimum, you will need to remove the 3 screws marked by red arrows. Personaly, I remove the 3 screws marked by the green arrows too for more confort. One of the screws is hidden by a VOID sticker (which unvalidates the warranty if you remove it). Either you don't remove this sticker, the other black screws will scratched by the screwdriver, and you will lose warranty in all cases.


Now, pull the plastic framework upside with your finger, to get access to the MicroSD card reader :


The MicroSD card is protected by a "metallic" sticker. Unstick it, and tear it below the plastic framework. You cannot remove it completely :


If you don't want to be annoyed by this sticker, place your piece of paper on it. Now push the memory card in his reader with the tweezers : you will here a clic. Release, the card will be ejected :


Take the MicroSD card with the tweezers, and remove it :


There you are. Now insert your brand new memory card, and reassemble your phone following the previous steps.

Once your phone is reassembled, put your SIM card, the battery, and close the cover.
To turn it on, push the two volume buttons, and keep them pushed while pressing the Power button :


Keep the volume buttons pressed until you see this message :


Press the Down Volume button to confirm the Hard reset :


Press again the Down Volume button to restart the phone. Follow the Windows Phone configuration wizard, then reboot your phone again (just a simple reboot).
And "voilà" ! A HTC HD7 with full memory !!!
 http://media.xda-developers.com/images/smilies/biggrin.gif


Updated on 28th April 2011 :
Compatible 32GB card :
- Sandisk SDSDQ-032G-J35 (Class 4 - Asian market)
- Sandisk SDSDQM-032G-B35 (Class 2 or Class 4)

Avoid these references :
- Sandisk SDSDQ-032G-E11M (Class 2 or 4)


[Thanks to Wolfman017 at XDA-developers.com]

gravatar

How to install Mango (beta) in your WM7 phone (ver 7712)

Finally, I did it. I installed mango beta in my HTC HD7. No doubt this is a great great leap forward for microsoft. But still we need much much more... 


How to install it? I will explain the process. but - I won’t be responsible if you end up damaging your device. Make sure to follow the steps without fail. Because i was able to install mango beta without any issues by following these steps. 


Let me thank windowsphonehacker.com and addictivetips.com for this. 


Requirements:
  1. 1. You must have at least 60% battery remaining in your phone. I completed the entire process by having less than 50% - but its recommended to have 60% or full battery.
  2. 2. Remember that the minimum hardware requirements for Mango beta are the same as Nodo (the last official update to microsoft - which gave you cut-paste option). If your device only supports pre-Nodo versions of WP7, then this procedure is not for you.
  3. 3. Go to this page, and download the file.

Instructions:
  1. 1. If you have a 32-bit system, go to this link, while for 64-bit, here. Download the tool suite provided on the respective links.
  2. 2. Install the developer tools you just downloaded and then exit setup.
  3. 3. Now we turn our attention to the “Mango For All” tool downloaded in step 3 of our requirements. Unzip the file if not a zipped, just copy the four contents), and save the unzipped contents to your system drive (c drive).
  4. 4. Using your phone’s USB cable, connect to your PC. This will automatically open up Zune. If not do nothing. 
  5. 5. If Zune opens up, Exit Zune without doing anything.
  6. 6. From the “Mango for all” folder, run “update.bat” file. This will open up a series of option screens, follow the instructions that do the following for you:
    Create a backup of your phone
    Provide your with enough rights to update to Mango
    Save your backup copy in the “Mango for all” folder (will take approx 600 secs)
  7. 7. This will open Zune all by itself, and you will get an update notification. That’s the Mango beta. After you apply it (update - 1), and reopen Zune, you will see again an update visible there (update - 2). This is the sought-after Mango beta 2. Install this and you now have Mango beta 2 on your WP7 Nodo device! (approx 20 - 30 mins) 
Important:

You must restore to NoDo before the Mango update is released, according to Microsoft. This applies to everyone, including registered developers.


Restore NoDo
To restore NoDo, run the Restore.bat file, or follow the instructions in Readme.txt.


Do not, at any cost, delete the premangostate folder in your C Drive. This is required to restore the Nodo version - once mango is officially out. 


Update: Your Zune will not detect the new mango OS. You have to download and install New Zune for Mango form here. Both old Zune and New Zune can be installed side by side. No problem. 


Thanks to : 

gravatar

Get 25 GB Cloud Storage (How to use Skydrive as Network Storage)

I was searching for a cloud storage application for my laptop, which can work just like my C drive or D Drive. What i mean is a cloud storage were I can drag and drop my files. 


So.. I came across Skydrive. This is a cloud storage service from Microsoft. 


What all you need to start this?


1. A live.com ID from Microsoft. (Click here to get one)


2. Get the WebDAV access address for your Skydrive account. For this there is a simple portable tool called SkyDrive Simple Viewer developed by Mike. Run the tool and login to your Skydrive and select the folder which you want to map.


Once these are ready, 


1. Run the Skydrive Simple Viewer.


Click on your folder you want to network and copy the address from right hand side. 


2. Goto your my computer and click on the Map network drive on the top. 


3. Now Click on the "Connect to a website that you can use to store your documents and pictures" link. 


4. Click Next in the window that pops up.


5. Click on Choose Custom network location and click Next


6. Paste the web address you got from Step -1 above. in the address bar. 


7. Click next


8.  It will prompt you to enter the Windows Live credentials after attempting to connect to Skydrive.


9. Now the network drive will be connected and you can see the drive in Window Explorer.


And thats all... you have a 25GB cloud storage in your computer. Just drag and drop the files. 

>